December 19, 2022
How to Design the Perfect Custom Printed Banner
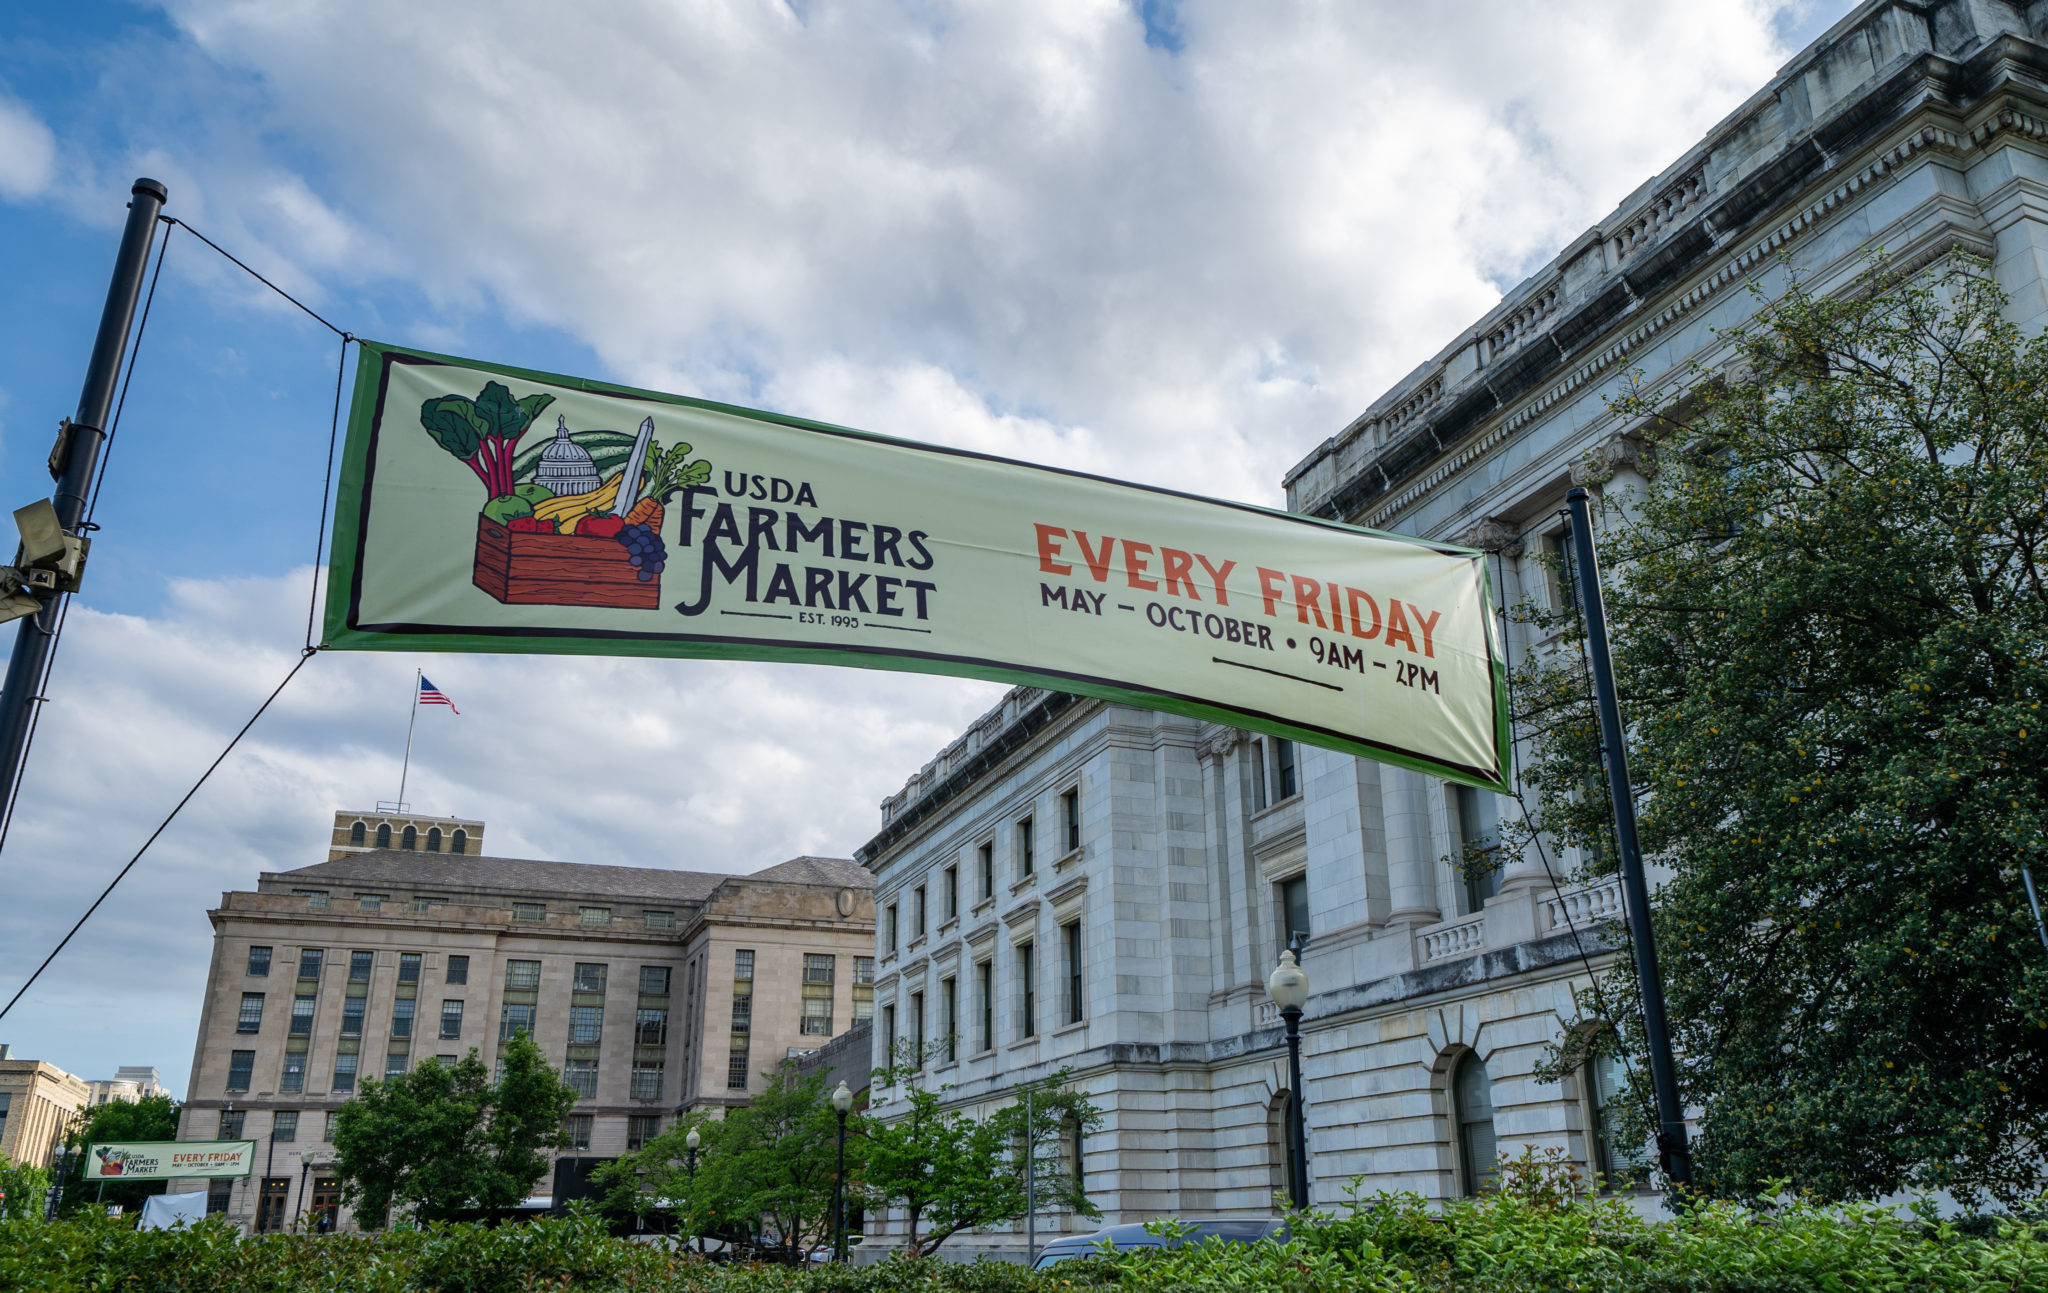
Banners are the ultimate way to grab people’s attention and convey key info in just a few seconds. Imagine this: you’re walking into a packed trade show or strolling down a street lined with stores. Banners are what catch your eye, announcing deals, new openings, or special offers. Their straightforward message makes them perfect for situations where time is of the essence. A well-designed banner can be the difference between drawing a crowd and blending in. Follow these steps to create custom printed banners that demand attention and drive results:
They say not to judge a book by its cover, but the design of your banner is the most important thing to consider. A good design will get your message across quickly and clearly, while the opposite could go as far as drive away your customers. To get your message across effectively, you need to plan your custom graphic design carefully, thinking about everything from colors to images in the context of your banner’s purpose.
Think of a banner like a billboard – it needs to be easy to read and remember, even just glancing at it. By taking the time to craft a thoughtful, visually appealing design, you can make sure your message sticks with your target audience and drives business results.
To make your banner notice-worthy, keep the copy short and punchy. Shorter text means you can make it bigger and bolder – so it’s really hard to ignore. In super crowded places like trade shows or festivals, huge fonts are a must if you want your custom outdoor banners to stand out and stay readable from a distance.
It’s best to leave images out unless they’re really necessary for your message. Too many pictures can be overwhelming and take people’s attention away from what you want them to remember. A small, stylish logo can add some professionalism to your banner and keep it consistent with your brand, as long as it doesn’t clutter things up. A good logo can subtly reinforce your brand without distracting from the main point. By finding a balance between simplicity and visual appeal, you can create a banner that effectively communicates your message and leaves a lasting impression.
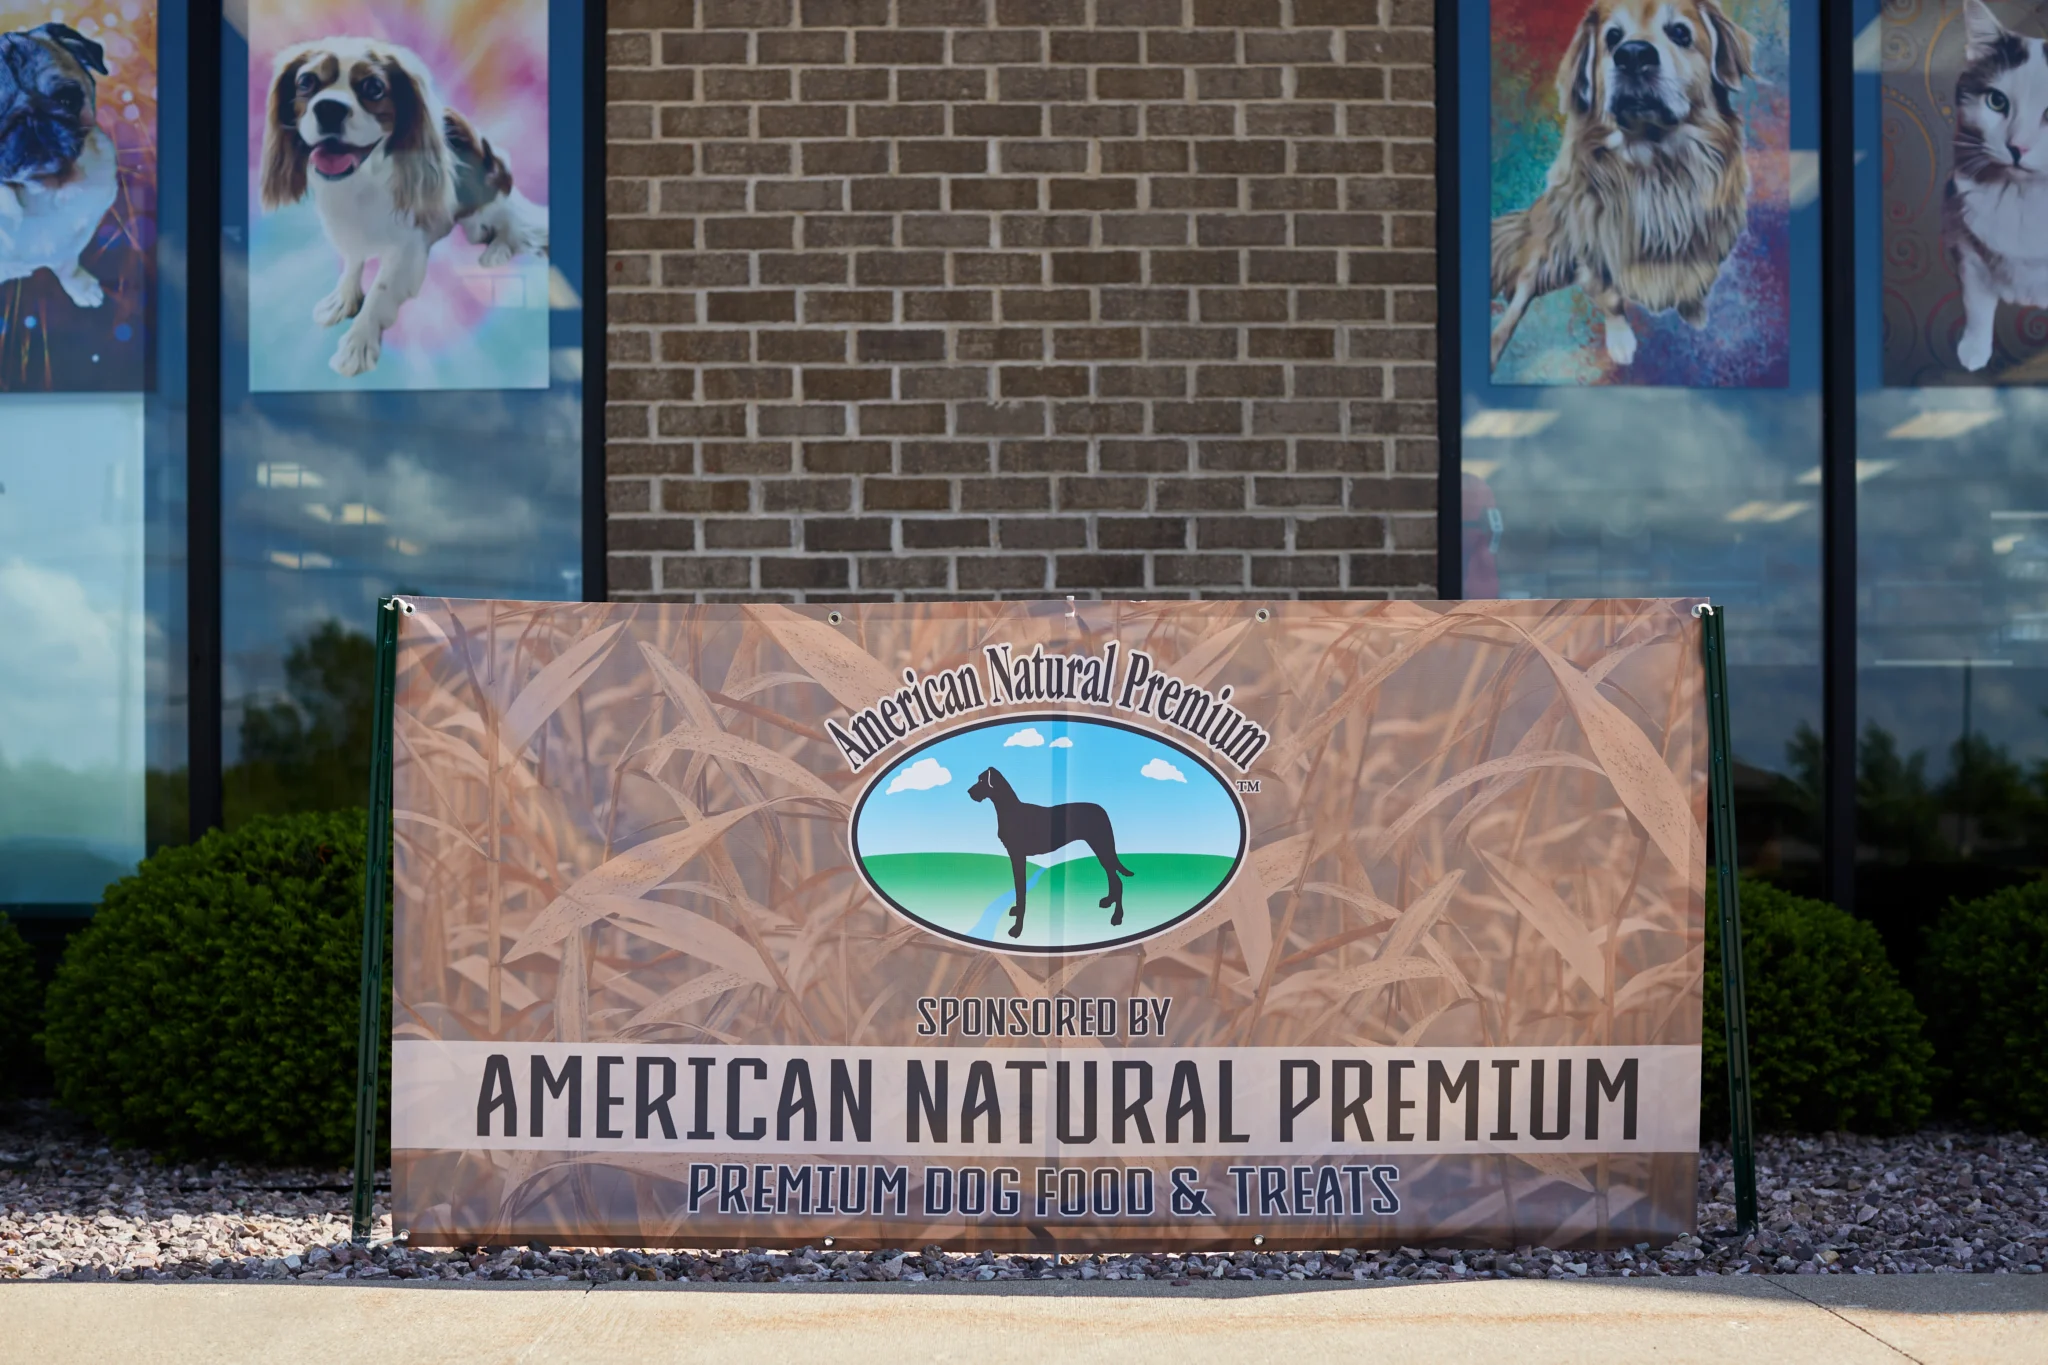
You can hang your custom printed banners either vertically or horizontally, depending on the look you’re going for. Next, pick a display method that works with your venue. For example, if you’re at a convention center, you might need to use their existing rigging system. But if you’re outside, you’ll need sturdier hardware that can handle the wind and weather.
Here are a few common options for hanging hardware to consider:
You could hang your banner from the ceiling with strong metal cables and hooks, creating a dramatic display. Or, opt for modern banner stands that are easy to set up and take down – they’re great for events with limited space. Wall-mounted brackets are another option, keeping your banner secure and looking clean and streamlined. By choosing the right hardware for your venue, you can make sure your custom printed banner gets the attention it deserves.
Plan ahead before finalizing your banner’s design. Think about where you’ll put the grommets – those metal rings that keep the corners of the banner stable. Make sure they don’t cover any important text or images. Also, consider where to place the pole pockets, which make it easy to slide poles in, and the banner stands, which keep everything steady. Also, if you’re displaying your banner outside, don’t forget to include wind slits. These narrow cuts let air pass through, reducing the stress on the material and preventing fraying or tears. By keeping these things in mind, you can ensure your banner looks great and gets your message across.
Worst case scenario, if you can’t get your banner design to a point that you’re happy with, many print shops have graphic designers on staff to help. If you choose to work with a professional designer, especially one with hands-on experience with vinyl or fabric banner printing, you’ll know your design will be perfectly fit to your needs. Plus, a designer will also have the know-how to ensure your custom printed banner is on-brand and cohesive with the rest of your marketing initiatives.
You need a banner that’s clear, sturdy, and lasts for years to come. At PostNet, consider our large printing professionals offer a resource for expert advice on materials and hardware to create both indoor and outdoor custom banners. No matter what you need or for what purpose, our locally-owned centers are ready to help!
The right material, also known as the substrate, will determine how long your banner lasts and how well it performs. This decision comes down to two main things: where you plan to display your banner and how long you need to keep it in your marketing inventory. If you’re organizing an outdoor event, for example, you’ll want a material that can handle tough weather conditions like heavy rain or intense sunlight. On the other hand, if it’s going to be inside, you can opt for a lighter, more affordable material.
Some popular choices for substrates are vinyl, fabric, and mesh. Vinyl is a popular pick for outdoor banners since it’s waterproof and doesn’t fade easily. For a more upscale look indoors, fabric banner printing is a great option – and they can be easily hemmed for a neat finish. Mesh banners work well outside in windy areas or for really large banners that need extra support. By choosing a suitable substrate, you’ll keep your banner looking great throughout its display period.
You can create a custom printed banner to fit any space – big or small. The main thing is to make sure it’s big enough to read from a distance. For example, a huge banner for a sports stadium needs to be enormous to grab the attention of people sitting far away. But a banner for a conference room can be much smaller since the audience is closer. If you’re hanging your banner in a tough spot, like on the side of your building, don’t forget to think about the height and adjust the size so it’s still easy to see from the ground.
You’ve got options when it comes to hanging hardware for your banner, and it all depends on what you’re hanging it from. If it’s going up on a ceiling or a beam, you’ll need something sturdy like a metal eyelet or a rope that can handle the weight. On the other hand, if you’re attaching it to a wall or a fence, strong adhesive strips or clips are the way to go.
Local print shops will have a range of options, including grommets, which are small metal rings that reinforce the corners, and bungee balls, which are elastic cords that give you some flexibility. They might also suggest pole pockets, which are sewn-in tubes that let you slide a pole through for easy hanging. Think about the size and weight of your banner and what you’re hanging it from, and you can choose the right hardware for a secure and professional-looking display.
As convenient as a giant online printer can be, local print shops can do more to help you with your banner printing and provide a completely unique, personalized service. With a local printer, you’ll get an expert who will carefully look over your design, ensure it fits your banner specifications, and can help you design other marketing assets to match your banner. They’ll think more about just your one banner order and more about how they can be a partner to you long-term. With their experience, they can make a custom printed banner that’s not just eye-catching, but goes hand-in-hand with everything else your business is doing.
Whether you want to grow awareness of your location or tell your customers about your latest sale, a banner will help you work toward your marketing goals. Find the PostNet location nearest you to create the custom printed banner that draws attention to your business today!